


 I’ve decided to blog rather than nap during quiet time this afternoon. Is this wise? Well, I was out with friends till midnight last night, and dragged myself out of bed to make last-minute school lunches this morning, and I hung today’s laundry while it was actually raining (spitting, more accurately), so I’m not sure wisdom is the word of the day. But getting ‘er done is. (Um, that phrase just insisted it had to be used). So, I made it through the morning with two exuberant children and nothing that a cup of coffee couldn’t fix, the big kids left with delicious nutritious meals in their backpacks, and the sun is now shining. This speaks to the luck of whim and of deliberately not making detailed plans.
:::
So, I know that many of you are already making your own yogurt (and a big thank you to all who have offered tips and instructions!), but for those of you who aren’t, or who are curious to try, I am here to tell you: It is easy! I’ve been making four litres of milk into yogurt (four litres of milk equals four litres of yogurt). This lasts our family about a week and a half. We eat the yogurt for breakfast; we eat it in place of sour cream on beans and rice, etc.; and I’ve been combining it with strawberries to make above-average popsicles.
:::
Homemade Yogurt
What you’ll need: whole-fat milk; yogurt starter; cooking pot; candy thermometer; insulated container; jars with lids.
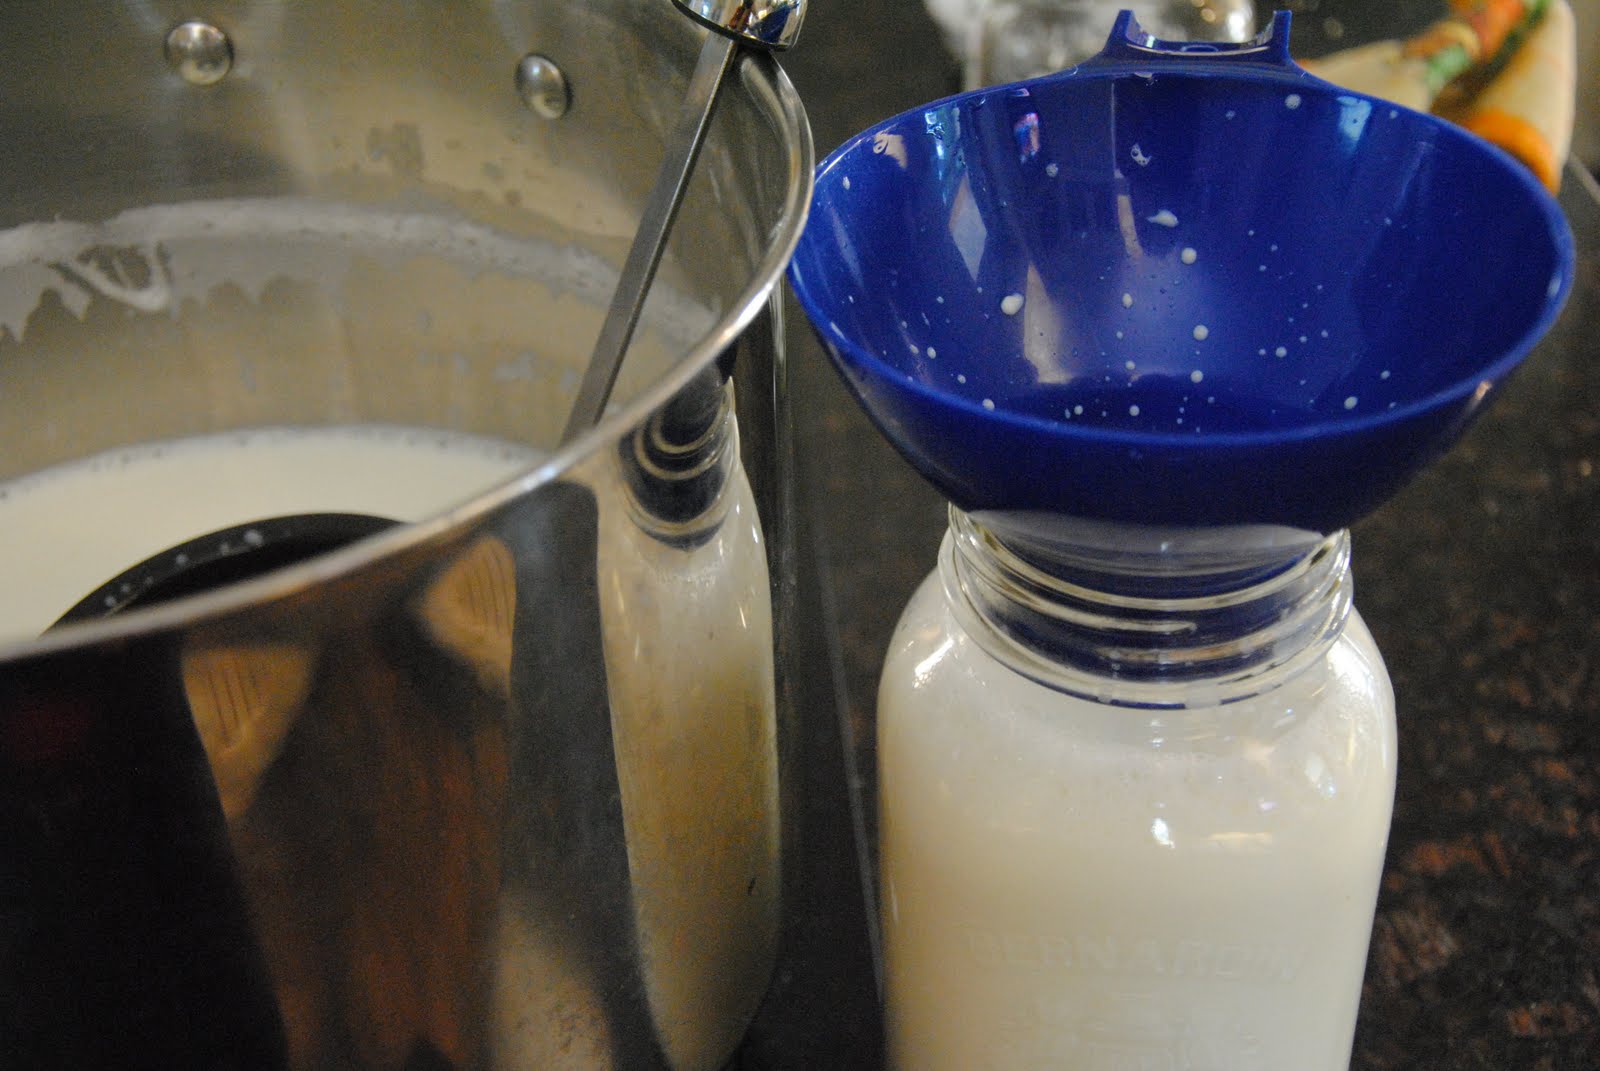
Directions: In a large pot, gently bring four litres of whole-fat milk to a simmer (or try a litre if you’re experimenting and nervous about potentially spoiling that much milk). Heat the milk to 180 degrees F, stirring occasionally to spread the heat, and to make sure nothing is sticking to the bottom. This takes some time, and I have not rushed it yet; and have had good results. For consistent results, I recommend using a candy thermometer affixed to the side of the pot. Meanwhile, “sterilize” several quart canning jars by pouring boiling water into them and letting them sit for a few minutes (I realize this does not actually sterilize them, but it’s as strict as I get in my kitchen; if you do something else, please let me know). The boiling water can be re-used: when you’re done sterilizing the jars, pour the hot water into a large plastic jug (or other container), and place the jug into an insulated cooler (which in this instance will be a heater).
When the milk has reached 180 degrees F, remove it from the stove, and cool. This goes faster if you set the pot into a sinkful of cold water. When the temperature has dropped to 110 degrees F (or more precisely is below 120 degrees, but above 90), stir in the bacterial starter. Translation: stir in some fairly fresh yogurt. You can freeze yogurt in ice cube trays for this purpose. I’ve erred on the side of more is better. I put in about 1/4 cup per litre, or even slightly more.
The Home Creamery is a good reference book on making all things milk-related, and it recommends 1/4 cup of starter per quart of milk.
Now, pour the prepared milk into jars leaving some space at the top, add lids, and place into the warm innards of the heated-up cooler. Don’t lift the lid for seven or eight hours. In the wintertime, you may need to check that the water is hot and the temperature approximately 90 degrees F; right now, not so much.
What you’ll get: And when you do finally peek, it will look like a little miracle has taken place right here in your own kitchen. Yogurt! Firm, sweet, tangy, creamy yogurt.
:::
It is easy to keep making something that tastes this good, and is as good or better than anything I can buy (my homemade bread falls into this category, too). On the other hand, it is rather less easy to keep making things that are less popular with the children (and with us) than storebought. So, I must confess that I’ve shelved a Green Dream or two, and have not made crackers since the first batch, which seemed to wane in popularity after a day or two; and we bought graham crackers for our firepit cook-out; and I haven’t pursued making pasta or cheese or …. you name it. Much food continues to come into our house packaged in plastic bags and cardboard boxes. SIGH.
Yogurt popsicles! Genius! I’m going to try that soon!
Hi Carrie,
I’ve found you through Nathalie Foy. Have enjoyed your blog a number of times and thought I’d say hello.
Love your nice specific instructions on yogurt-making. I posted about making some under the tutelage of a friend (http://thekingsandi.wordpress.com/2010/04/01/one-small-change-making-yogurt/), but I had poorer results when I tried on my own. I’ll try again with your post by my side. Thanks!
I’ve been making yogurt for a while but I think I’m a lot lazier at it than you are. I don’t bother with the temperature – I just bring the milk to an almost-boil, stir in the starter, pour it in a glass jar (that I haven’t sterilized) and pop it in an over over night. I usually wrap the jar in a towel to keep some of the heat in and I preheat the oven a bit so that the heat slowly seeps out. I’m thinking maybe I will try your trick of sterilizing the jars with hot water and then puting the hot water in the oven with the yogurt over night.
I like discovering how many different ways there are to make yogurt. I think it makes leaping in less intimidating.
Carol and Melanie, both of your methods are definitely less finicky than the one I’m using (and I know yours is easier, too, Nath!) … but as a novice yogurt-maker, the thermometer is my ally, and it’s given me very consistent results. I imagine it’s like bread-baking, which is now so easy for me that I can’t imagine every thinking it would be hard.
Happy yogurt-making, everyone! It’s great to hear from you.